Orecchiette Improv

One of Lolly’s more adventurous roles as my loving spouse for these many years has been as my de facto guinea pig for new creations in the kitchen, a sort of culinary crash test dummy, if you will.  Usually she doesn’t mind it, because usually my experiments come off reasonably okay.  Occasionally the results are less than ideal, but she just gives me her honest feedback without excessive griping or cat-calling.  To her credit, she hasn’t thrown any of my dishes back at me in months.  Today she got the chance to test the limits of her herculean endurance one more time.

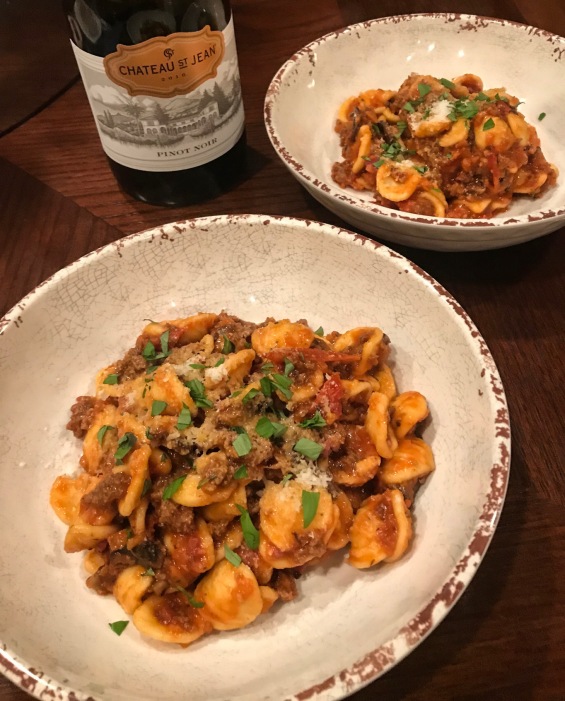
Last night we had some friends over for dinner and, as I am sometimes wont to do, I bought way too much food, thinking I might make things which, in actual practice, never got made.  So here I am today, with all sorts of extra perishable ingredients on hand, wondering what to do with them.  The answer, of course, is:  Improvise!  I gathered up these orphaned items, along with a few other strays from my pantry, and set to work using whatever I had on hand.  Here was the finished product:

IMG_1791_edited

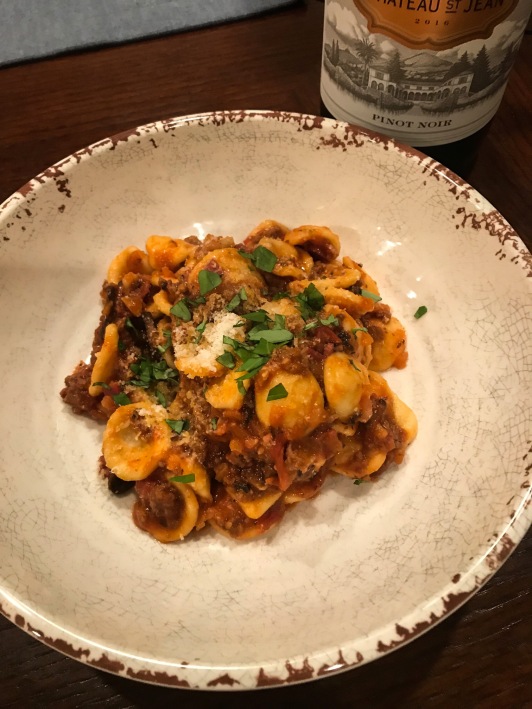
This is a meat-focused pasta sauce that leans in the direction of a Bolognese, built around some Orecchiette pasta, since I happened to have a package of that in the pantry.  The following ingredients, when paired with a side salad and some fresh bread, will feed at least 6 hungry lumberjacks:

  • 1 lb. Angus ground chuck
  • 3-4 oz. sliced cappicola or prosciutto, minced
  • 1 medium red onion
  • 1 medium carrot
  • 1 stalk celery
  • 3 cloves garlic, minced
  • 4 tbsp. olive oil (divided)
  • 1 lb. cherry or grape tomatoes
  • 1/2 cup dry red wine
  • 1 can (6 oz.) tomato paste
  • 1 can (15 oz.) low sodium beef broth
  • 1 tsp. dried oregano
  • 1 tsp. dried basil
  • 1/2 tsp. chili flakes (optional)
  • 1 tbsp. butter
  • 8 oz. portabella mushrooms, stemmed and chopped
  • Salt and pepper to taste
  • 1 lb. dried Orecchiette pasta
  • Grated parmesan and chopped basil for garnish

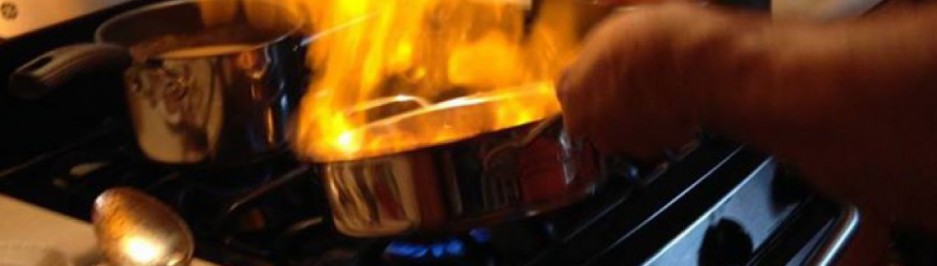
In a large deep skillet, cook the meats over medium heat until the beef is browned and the fat is rendered from the cappicola or prosciutto.  Break up the beef as finely as you can in the process.  While the meats are cooking, use the pulse function of your food processor to finely chop the onion, carrot and celery.

When the meats are finished, remove them to a paper towel-lined plate to drain.  Add 2 tbsp. of the olive oil to the skillet and cook the garlic and chopped vegetables until tender, which will take only a few minutes.  Add the tomatoes, cook for a few minutes more, then use a wooden spoon to press them until they burst and release their juices.  Deglaze the pan with the wine, then stir in the tomato paste, followed by the beef broth.  Lastly, stir in the dried herbs and chili flakes, then return the cooked meat to the sauce. Cover the pan and let the whole thing simmer for about 20 minutes to blend the flavors.  Use salt and pepper to adjust your seasoning as needed.


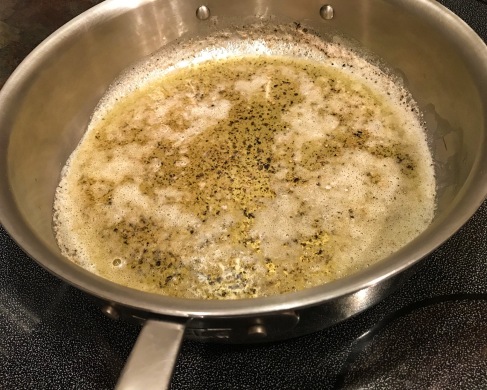
Meanwhile, start some salted pasta water boiling and, in a separate skillet, heat up the remaining 2 tbsp. of olive oil and the butter.  Sauté the mushrooms until they are well-browned, seasoning them with a bit of salt and pepper, and stir them into the main sauce.  Let the sauce continue to cook another 20 minutes or so, using that time to cook the Orecchiette.

When the pasta is finished and drained, combine it with the sauce and you’re ready to serve.  Garnish with freshly grated parmesan and chopped basil.  We paired this with a lovely Pinot Noir and enjoyed this experimental dish with great gusto.  Lolly gave it a big thumbs up.  Give it a try and let me know what you think — I’m always open to suggestions on how to do it better.  Until next time:  Eat well, my friends!

IMG_1789_edited


Dave’s Famous Baked Beans

This brief but momentous post goes out specially to my best brother, Mike Cunningham, grill-meister extraordinaire, who heaps glowing praises on this dish whenever he is blessed to partake of it.  Admittedly my baked beans are not super famous — yet — but give it time.  I have been perfecting this recipe on and off for the past few decades.  It is an outgrowth of a family recipe that I enjoyed as a kid and learned to recreate by repeated experimentation and adjustment.  At long last, it is fit for print.  Actually, I just have never gotten around to putting it in writing until now.  But whatever.

img_1773_edited

Just a small dietary warning up front:  this dish is not low-fat, vegetarian, vegan, kosher, halal, or even remotely good for you.  Lots of bacony, fatty, sugary goodness going on in this one.  You only live once, so make it count, I say.  Here are the ingredients to make 8 generous servings:

  • 8-10 oz. thick cut bacon (preferably brown sugar bacon)
  • 1 medium onion, diced
  • 2 cans (15 oz.) great northern beans, drained and rinsed
  • 2 cans (15 oz.) pinto beans, drained and rinsed
  • 3/4 cup ketchup
  • 1/2 cup molasses
  • 1 cup (packed) dark brown sugar
  • 1 tbsp. yellow mustard
  • 2 tbsp. Worcestershire sauce
  • 1 tbsp. apple cider vinegar
  • 1 tsp. Red Hot or Tabasco sauce
  • Salt and pepper to taste

Preheat your oven to 350°.  The secret to this dish is to use a cast iron Dutch oven, which you will want to preheat on the stovetop to medium heat.  Cut up the bacon into 1/2″ pieces and cook it until the fat is rendered and the pieces are a lovely reddish-brown color, about 10 minutes, then use a slotted spoon to set it aside.  Don’t worry about draining it — we’re going full fat on this recipe, folks!  In the bacon fat, sweat the onions until tender, about 5 minutes.  Remove the Dutch oven from the heat, and stir in the remaining ingredients along with the bacon, like so:

img_1764_edited

Cover the Dutch oven and pop it into your (non-Dutch) oven for about an hour and a half, until the beans are melt-in-your-mouth tender and oh so yummy.  And that’s all there is to it — the simplest, most heart-stopping (in all senses of the phrase) baked beans you will ever have the privilege to put in your mouth.  Serve them up with some smoked yumminess like these ribs that just spent six hours on my Traeger, and all your earthly troubles will fade into insignificance.  Boasting?  Moi?!?  I guess you’ll just have to try the recipe and find out for yourself if it’s really that good.  Until next time:  Eat well, my friends!

img_1771_edited

img_1775_edited

Chicken Fajita Street Tacos

Okay, first let me offer up a heartfelt mea culpa for over four months of inactivity.  My three year blogiversary came and went unremarked a couple weeks ago, although, in my defense, on that day I was making Indian food and smoking a rack of ribs, so it wasn’t like I was totally neglecting my culinary pursuits.  Busy life, yada yada, but also feeling decidedly uninspired for a while.  It just seemed like I wasn’t doing very much in the kitchen that I considered blogworthy.  Not that I have suddenly had some mystical epiphany, but I had a bit of a prompt today that spurred me into action.

Today I happened to get a phone call from my son, who lives in San Diego and has access to truly amazing, authentic Mexican food.  When I told him I was planning to make authentic tacos for dinner, he was incredulous at my assertion that mine were comparable to the real deal.  My response, naturally, was:  Challenge accepted!

Good Mexican food is not an easy thing to find in the Cincinnati metro area, notwithstanding the size of this market.  Yes, there are a small handful of reasonably authentic places, but most restaurants around here have the typical cliché, Americanized menus that a person of Mexican descent would scarcely recognize as his or her native cuisine.  One thing that I truly enjoy is the simplicity of good street tacos — full of fresh, bright and savory ingredients that practically grab you by the lapels and scream authentic Mexican.  The good thing about them is just how easy they are to replicate, even for a gringo like me who has only ever visited Mexico once in my life.  The last time I had really good tacos in a restaurant, I made some mental notes, and ever since then I have been able to make my own without the benefit of recipes.

img_1731_edited

My favorite varieties of street tacos are chorizo, lengua (beef tongue), and tonight’s offering, chicken fajita style.  Here are your ingredients to make about 10-12 of them:

For the marinade:

  • Juice of 1 large lime
  • 2 tbsp. olive oil
  • 1/2 tsp. ground cumin
  • 1/2 tsp. kosher salt
  • 1/4 tsp. black pepper
  • 1 tbsp. fresh chopped cilantro

For the main recipe:

  • 1 1/2 lb. boneless, skinless chicken breast
  • 4 tbsp. vegetable oil (divided)
  • 1 red bell pepper, sliced into strips
  • 1 green bell pepper, sliced into strips
  • 1 medium yellow onion, sliced into crescents
  • Juice of 1/2 lime
  • Kosher salt and pepper to taste
  • 10-12 flour tortillas OR 20-24 soft corn tortillas (street taco size)
  • Fresh lime wedges and cilantro for garnish

img_1718_edited

Start by mixing the marinade ingredients in a bowl.  Pound out the chicken breasts to a uniform thickness of about 1/2 to 3/4 inch, and place them in a gallon-size zipper bag.  Pour in the marinade mixture, seal it up, and toss it in the fridge for about an hour.  When the hour has elapsed, heat a heavy skillet, preferably cast iron, over medium-high heat until it reaches the smoke point.  Add 2 tbsp. of the vegetable oil and, when it is ripping hot, remove the chicken breasts from the marinade bag and drop them into the skillet for a hard sear.  Reserve the remaining marinade — we will use it later.

Cook the chicken for at least several minutes on each side, turning occasionally, until well browned and the internal temperature reaches 165º.  That should take about 10-12 minutes in total.  When it is done, transfer the chicken to a plate or cutting board to rest.

While the chicken is resting, add the remaining 2 tbsp. of vegetable oil and throw the peppers and onion into the skillet, followed by the reserved marinade.  Some folks may not feel comfortable using the marinade after it has been steeped in raw chicken, but as long as it gets cooked to 165º (which it will), it is perfectly safe to use and enhances the flavor of the peppers and onion.  Sauté the vegetables until they are tender and well browned — they will initially release water and deglaze the skillet, so keep going until the skillet begins to look dry again.  Season with salt and pepper, and squeeze the remaining lime juice onto them as they cook.

img_1726_edited

Meanwhile, slice the chicken breasts across the grain at a thickness of about 1/4″, like so:

img_1728_edited

When the vegetables are done cooking, stir the chicken back into the skillet with them just long enough to reheat it, and remove the skillet from the heat.  With that, you’re ready to plate up with some fresh cilantro, lime wedges and your favorite hot sauce.  Here is where I put in a plug for my personal favorite, CaJohn’s jalapeno sauce — pure, fresh, jalapeno goodness.  And of course, I keep some of My All-Time Favorite Guacamole handy on the side.  Just a quick note on the tortillas:  corn shells are usually doubled up due to their thinner and more delicate structure, which is why I suggest having twice as many on hand.

My son will be visiting from San Diego later this month, so I plan to make some of these and my chorizo tacos for him to compare against the stuff he gets in California.  Maybe I’m a little brash, but I think he’ll have a tough time tasting much of a difference.  Until next time:  Eat well, my friends!

img_1738_edited


Wings and Fries – Middle Eastern Style

As an avid home chef, I have this bad habit of acquiring too many cookbooks. I’m not a collector, per se, more of an impulsive shopper. Cookbooks have this delightful ability to fire up my imagination, to spark creative desires to work with this ingredient, or that technique, or to have an excuse to buy a new piece of equipment – I also have a bad habit of acquiring that stuff too.  I do try to exercise some self-restraint, but you know how that goes…

Anyway, not long ago I picked up this title on Middle Eastern cuisine.

IMG_1469_edited

I love cooking in this style because of its overlap with Mediterranean fare, and interesting ingredients like ras el hanout or the sometimes face-ripping spicy harissa. Yesterday I was thumbing through this book and decided to try a couple of the recipes that attracted me to it in the first place. The first is chicken wings with an orange, thyme and spice glaze, and the second is oven roasted sweet potatoes with feta.

IMG_1487_edited

I will tackle each one separately. Due credit to the author for some stunningly yummy offerings, to which I made minimal variations. The quantities here will serve probably 3 people. Note that the chicken can, and probably should, be started the day before to take full advantage of the marinade time.

For the chicken wings:

  • 2 ¼ lb. bone-in chicken wings
  • ¾ cup orange juice
  • 6 tbsp. orange marmalade
  • 4 tsp. dried thyme
  • 2 tsp. ground cinnamon
  • 1 tsp. turmeric
  • 1 tsp. cayenne
  • 3 cloves garlic, minced
  • 3 tbsp. olive oil
  • Kosher salt and cracked pepper to taste

Place the wings in a large bowl. In a separate bowl, combine all the other ingredients to form a marinade, seasoning generously with the salt and pepper. Pour the marinade over the wings and mix thoroughly, then cover the bowl with plastic and refrigerate for anywhere from 3 to 24 hours, the longer the better.

After marinating, let the wings come up to room temperature and preheat the oven to 400°. Line a baking sheet with parchment and bake the wings for 25 minutes. While the wings are baking, transfer the leftover marinade to a saucepan, bring it to a boil and then simmer to reduce to a thick sauce. At 25 minutes, turn the wings over and brush them with the sauce and pop them back in the oven for another 25 minutes. Brush one more time with the sauce, and serve them up piping hot.

IMG_1475_edited

For the potatoes:

  • 2 large sweet potatoes
  • 1-2 oz. olive oil
  • 2 cloves garlic minced
  • Kosher salt and cracked pepper to taste
  • 4 oz. crumbled feta
  • 1-2 tsp. dried oregano
  • 2 tbsp. Greek yogurt

Preheat the oven to 400° and line a baking sheet with parchment. Peel the potatoes and cut them lengthwise into 8 wedges each. In a small saucepan, combine the olive oil and garlic, and let them warm over very low heat for about 10 minutes to infuse the garlic flavor into the oil, taking care not to let the garlic brown. An easier option if you have it is just to use store-bought garlic oil, but I didn’t have any on hand. After the oil is infused, pour it over the potato wedges, season with the salt and pepper, and toss to make sure everything is evenly coated. Then into the oven they go for about 45 minutes or until they show some nice caramelization around the edges.

While the potatoes are baking, combine the feta, yogurt and oregano in a bowl and let them sit out to come up to room temperature. When the potatoes are done baking, dollop the cheese onto them and sprinkle with a tad more dried oregano.

IMG_1478_edited2

And with that, it’s time to plate and serve. The wings have a lovely spicy-sweet flavor profile with enough heat to be interesting but not overwhelming. The potatoes have a deep, subtle sweetness balanced by the garlic and accented with the twang of feta. The overall effect is extremely pleasing and these to dishes work very well together. And I made these on a Monday night after work (not counting the 24-hour marinade, which I started yesterday). Give them a try and let me know your thoughts – and give this book a hard look in the meantime. Until next time: Eat well, my friends!

IMG_1484_editedIMG_1488_edited

Thai Chicken and Veggie Curry

I recently discovered a new smartphone app that helps me manage my pantry inventory, including the fridge and freezer, and keep track of expiration dates.  This is especially useful for someone like me who has a bad habit of buying ingredients with the idea that it would be cool to figure out a use for it sooner or later.  Needless to say, in time that sort of thing lends itself to an overstocked pantry.

One of the benefits of the new app is the ability to stay on top of some of those impulse items that need to be used before they get too old.  I spent a good chunk of this weekend taking inventory with the handy barcode reader that is built into the app. When I was done I started noodling about dishes to make with what I have on hand. Tonight’s offering is an improv using mostly just what I had, except for the fresh vegetables – a Thai-style red curry chicken with broccoli, zucchini and bamboo shoots.

IMG_1395_edited

Here are your ingredients to make four servings:

  • 2 tbsp. olive oil
  • 1 tsp. garlic paste
  • 1 tsp. ginger paste
  • 1 lb. boneless, skinless chicken thighs, trimmed and thinly sliced
  • ½ medium onion, sliced into crescents
  • 2-4 tbsp. red curry paste (according to taste)
  • 2 cans (13.5 oz.) coconut milk
  • 1 can (8 oz.) sliced bamboo shoots
  • 1 medium zucchini, sliced into 1/4” rounds
  • 8 oz. broccoli florets
  • ½ cup fresh cilantro leaves, coarsely chopped
  • Juice of ½ lime
  • Kosher salt to taste
  • Sliced green onions for garnish
  • Cooked jasmine rice to serve

IMG_1391_edited

A quick note on the red curry paste – it can pack a wallop, depending on the brand and how much of it you use.  I’m a total spicy food junkie – the kind that goes into an Asian restaurant with a 1 to 10 heat scale and orders a 15 or a 20.  Yeah, I’m that guy. Unfortunately, Lolly is the polar opposite of that, so I have to compromise – somewhat.  I used a paltry 3 tablespoons of the paste and listened to her gripe about it more than once, but I’m toughening up her palate.  She’ll thank me someday when she’s able to experience the joy of the ghost chili without flinching.  Moving right along …

In a deep skillet, heat the olive oil over medium flame, then stir in the garlic and ginger pastes, followed by the chicken. Cook until the chicken is mostly done, about 5 minutes, then add the onions and cook a few more minutes until they are tender. Add the curry paste and one of the cans of coconut milk, stirring thoroughly to ensure the paste is completely dissolved. Add the bamboo shoots, then cover the skillet and simmer on low heat for at least one hour. The goal is to make the chicken super tender while infusing it with the flavor of the curry, so if you can let it braise a little longer than an hour, so much the better.

Now we’re coming down to the finish line.  At this point it’s a good idea to get your jasmine rice on to cook so it finishes up at the same time as your curry.  By the by, I happened to have some extra chicken stock on hand, so I used that instead of water to make the rice.

Stir the broccoli and zucchini into the curry mixture, along with the second can of coconut milk, cover the skillet again and continue to cook on low heat until the vegetables are tender, about 15 minutes. Remove the skillet from the heat, stir in the lime juice and cilantro, and adjust your seasoning with some kosher salt.  With that you’re ready to plate – or bowl, as we did tonight.

IMG_1393_edited

We served this up over hot, fluffy jasmine rice and topped it with some fresh green onions sliced on an extreme bias to look extra pretty.  For an improv dish I was quite pleased with how it came out – very fresh, light and authentic tasting, practically bursting with genuine Thai flavors, and generally a healthy, balanced meal for good measure.  I hope you’ll give it a try and enjoy it as much as we did – despite Lolly griping about the heat level.  We’ll keep working on that.  Until next time: Eat well, my friends!

IMG_1398_edited

A Modest Tribute

This morning, along with the rest of the culinary world, I was met with the awful news of the passing of Chef Anthony Bourdain.  It struck me more than the typical news of this nature, I guess because he struck me as someone who nurtured a special zest for the boldness and variety of life’s possibilities.  A few years back I read his book, Kitchen Confidential.  If you’re unfamiliar, it is his autobiographical narrative of his transformation from a humble fry cook in Provincetown to a sought-after Manhattan chef.  My take-away from that book was a respect for the chef’s perseverance and determination to succeed in an extremely challenging line of work, and to find a way to enjoy life at its most elemental level – in the profound simplicity of good food.

And succeed he did.  Several books and a couple acclaimed television series later, Anthony Bourdain had become a household name to anyone with more than a passing curiosity about the culinary world.  His rise from ignominious beginnings to global recognition is a vivid illustration of just what is possible to the person who chooses to seize whatever opportunities life happens to put in his path.  He went on not just to stardom, but to influence millions of readers and viewers about how to enjoy life in the moment.

I must confess I am almost embarrassed to toss out a recipe in this post, but I do this for a very specific reason.  One of my earliest encounters with Anthony Bourdain, before I read any of his books or really even knew much about him, occurred while channel surfing a number of years ago.  I stumbled onto an episode of “No Reservations” in which he was in Rome and visited a back-alley, hole-in-the-wall restaurant where the chef prepared for him a dish called Cacio E Pepe.  I had never heard of it before.  I soon learned that it is the quintessential Italian pasta dish, and often part of the job interview for a cook wanting to work in an Italian kitchen.  As I watched, I vicariously savored this simple yet stunningly delicious dish right along with him.  In hindsight I think that episode was a kind of metaphor for what he was trying to teach us about the profound enjoyment that is just waiting to be savored in the uncomplicated things of life.

So it is, with great humility, and as a modest tribute to the departed Chef, that I offer my own version of Spaghetti Cacio E Pepe.  Here is a recipe for two servings:

  • 8 oz. dried spaghetti
  • 6 tbsp. whole butter
  • ¼ cup extra virgin olive oil
  • Fresh cracked black pepper to taste
  • ½ cup grated parmigiano-reggiano
  • ½ cup grated pecorino romano

Cook the spaghetti in salted water until al dente. While the pasta is cooking, in a deep skillet melt the butter over low heat, and stir in the olive oil. Then start cracking pepper like you mean it – lots and lots of pepper. Don’t be shy. Kinda like this.

IMG_1335_edited

After the butter-oil-pepper mixture has had a few minutes to blend the flavors, transfer the cooked pasta directly into the skillet, along with about ¼ cup of the pasta water. Toss in the grated cheeses and swirl it all together vigorously until the cheeses melt and form a creamy sauce on the spaghetti.

12188174_1650831961860653_7030221501713332811_o[1]_edited2

Plate it up, add a couple more turns of cracked pepper and a little more fresh grated parmigiano, and it’s time to mangia mangia.  As you do, raise a glass of your favorite wine to Chef Bourdain, who, if not necessarily legendary, certainly strode boldly across the modern culinary landscape, daring us to experience the new and the different.  He will be sorely missed.  Until next time: Enjoy life every moment of every day, and eat well, my friends!

IMG_1339_edited

Handmade Ravioli with Pesto and Pine Nuts

The month of April has been a momentous one for our family. First, our daughter came to visit us from California for about four weeks. A couple days later, Lolly brought home our newest family member, Winston. And to top it all off, our son graduated college this past weekend and is preparing to move to San Diego in a couple weeks. Like I said, momentous.

And of course, I took the whole thing as an excuse to cook more than usual. At every opportunity I wanted to make something special for my kids, who are not able to visit nearly as often as we would like. Our daughter will be flying home later today, so for our last family dinner before her return to sunny California I prepared homemade ravioli stuffed with robiola, ricotta and pancetta, served over pesto with toasted pine nuts.

IMG_1242_edited

Really this dish was just an excuse to play with my dough board and pasta roller. Beyond that, it takes no time at all to put together. Here are your ingredients for 4-6 servings:

  • 2 cups Italian “Tipo 00” flour
  • 3 large eggs
  • 1-2 oz. cold water
  • 4 oz. robiola (rind removed)
  • 4 oz. pancetta, chopped
  • 8 oz. ricotta
  • Egg wash (1 beaten egg plus 1 Tbsp. water)
  • Extra flour for dusting
  • ¾ cup basil pesto
  • ¼ cup pine nuts
  • Extra virgin olive oil for drizzling

Just a couple quick ingredient notes. If you can find some, I would recommend using a good Italian “Tipo 00” flour as shown below. It is finely ground and works superbly for pasta and pizza dough. Robiola is a wonderfully creamy Italian cheese that comes in an edible rind, but for the sake of this recipe you will want to remove the rind and just use the creamy center – which means you will actually need to buy about 8 oz. of cheese to get enough for the recipe. Lastly, I used a good quality jarred pesto and therefore did not include a preparation for that in this post.

IMG_1224_edited

Since we’re making ravioli we’ll need pasta sheets. If you have one available, I strongly recommend working on a large wooden surface – I use a dough board when making pasta. Heap the flour in the middle of your workspace, create a well in the center, and put the eggs in the well. In my experience it makes life easier to beat the eggs first, rather than trying to whip them up in the flour well. Also, I think it’s helpful for the texture of the pasta to add an ounce or two of water to the beaten eggs, but I’m sure many an Italian grandma would label me a heretic for saying that.

IMG_1225_edited

Using a fork and working outward from the center of the well, gradually stir the flour into the eggs. It will pull together to form a rough dough. Lay aside the fork and use your hands to shape the dough into a ball, then start kneading. It will be a little uncooperative at first, with lots of little bits that don’t want to join in, but be persistent and keeping working it. Knead your dough ball on the board until it smooths out, which should take about 10 minutes. Then wrap it up in plastic, set it aside and rest it for 30-60 minutes. While the dough is resting, combine the cheeses and pancetta in a bowl, and start heating a large pot of salted water to a boil.

We now have about a pound of pasta dough. Divide it into six pieces, each about the size of an egg. As you work with each piece, keep the others covered in the plastic to prevent drying. Gently flatten out one of the dough pieces and, with your pasta roller on the widest setting, roll it through once. Fold the resulting sheet into thirds, turn it sideways, and then feed it through again. Now adjust your rollers one setting narrower, run the sheet through again, and keep doing this until you get to the narrowest setting on your roller. When you get done, you should have a beautiful thin pasta sheet. Make a second sheet as well.

IMG_1240_edited

Lay one sheet on your work surface, brush it with egg wash, then begin to make two rows of small teaspoon-sized piles of cheese mixture with about an inch in between. You should be able to get about a dozen on one sheet. Lay the second sheet on top of the first and gently seal the edges and the spaces in between the piles, then cut them apart (and cut away excess pasta) with your handy ravioli cutter. Using the back of a fork, crimp the edges of each ravioli. After you finish working three pairs of pasta sheets in this manner, you should have about three dozen ravioli.


In a small saucepan, warm up your pesto over low heat. In a small, dry skillet, begin gently and carefully toasting your pine nuts – but watch them like a hawk and toss them often, because they will burn in the blink of an eye. With your pasta water at a gentle boil, drop in the ravioli to cook for about 8 minutes, then drain them. Spoon some of the warm pesto into the bottom of a bowl, lay in about six ravioli on top, drizzle with some olive oil and sprinkle with a few of the toasted pine nuts.

As you might expect, our family enjoyed this dish immensely, and our kids told me how much they’re going to miss Chef Dad’s cooking when they’re in California – but hey, that’s just a reason to travel more. Until next time: Mangia mangia, amici!

IMG_1243_edited


Mediterranean Improv

It’s been a beautiful sunny day here in the Cincinnati area, and I got to spend the day in the demo kitchen at Williams-Sonoma, followed by a relaxing almost-spring walk around the neighborhood with Lolly.  She is finally near fully recovered from her mishap a couple months ago with my chef’s knife, which means she’s back to her normal workout regimen and a new healthy eating push.  For Chef Dave, that translated into “Make me something Mediterranean and not too fattening.”  Although I have several cookbooks in that vein, tonight’s dinner was improvised based on some ideas I picked up from flipping through those volumes.

IMG_1112_edited

On the plate we have harissa grilled chicken, Greek-style mashed potatoes, and sautéed balsamic green beans. These are all super-simple dishes and will come together fairly quickly. I’ll take each of them one at a time, and these are scaled for two diners:

For the chicken:

  • 2 large chicken breast halves
  • ½ cup mayonnaise
  • 2 tbsp. harissa sauce

If you’ve never encountered harissa before, it’s a traditional and fairly common Mediterranean and Middle Eastern relish made of red chili peppers. It’s got some definite heat to it, so use more or less to suit your preference. Harissa is also available in a dried spice form. If you use that instead of the sauce, one teaspoon should be plenty.

Pound the chicken breasts to about ½ inch thickness, then slice them lengthwise into two pieces. Combine the mayo and harissa in a large bowl until well mixed, then add the chicken and stir until the pieces are completely coated with the mixture. Grill the breasts until they reach an internal temp of 165°, which shouldn’t take long at all, and they’re ready to serve.

For the mashed potatoes:

  • 1 lb. russet potatoes
  • 2 tbsp. butter
  • ½ cup whole milk
  • ¼ cup extra virgin olive oil
  • Juice of ½ lemon
  • 1 tbsp. chopped fresh flat-leaf parsley
  • Kosher salt to taste

Peel the potatoes and cut them into 1-inch chunks. Place them into a saucepan and add cold water until it covers one inch above the top of the potatoes. Bring them to a boil and cook until tender, which should take about 15-20 minutes – I test them by poking with the tip of a paring knife until it meets no resistance. Drain the potatoes and add the butter to melt.

When the butter is melted, add the rest of the ingredients except the parsley, after which you will need to mash the potatoes by any handy means until more or less creamy – I use a handheld mixer. Lastly, stir in the parsley and you’re ready to serve.

For the green beans:

    • 8 oz. fresh green beans
    • 1 medium shallot
    • 2 tbsp. olive oil
    • Kosher salt and black pepper to taste
    • 1 tbsp. balsamic glaze

Partially cook the beans by blanching or steaming until tender but not too soft. Meanwhile, slice the shallot lengthwise into thin crescents. Heat the oil in a skillet over medium-high flame, sauté the shallot for about a minute, then add the beans and season them with salt and pepper. Continue sautéing until the beans are tender and develop a little brown color. Drizzle the balsamic glaze over the top, toss to mix and then remove from the heat and you’re ready to serve.

IMG_1109_edited

And with that, all three dishes are finito.  For the more adventurous among you, spoon a little more harissa onto the chicken for some extra bazinga.  Plate them up and munch them down with big happy grins all around.  Tasty and kinda-sorta healthy at the same time.  Who knew?!?  Until next time: Eat well, my friends!

IMG_1118_edited2

My Best Bourguignon Ever (So Far)

You haven’t truly lived until you have enjoyed the indescribable pleasure of a rich, hearty bowl of savory beef bourguignon.  My condolences to all my vegetarian readers out there – you don’t know what you’re missing.  I’ve been experimenting with various recipes for years, and picked up a very respectable one in culinary school, but what follows is an evolving recipe which, with my latest tweaks, recently resulted in my most successful iteration of this classic French beef stew to date.  This dish is an all-afternoon love affair, so plan on at least 4 hours for total prep and cook time.

IMG_1049_edited2

Here are your ingredients to make six very satisfying servings:

For the main stew:

  • 10 oz. thick cut bacon, sliced into 1” pieces
  • 2 tbsp. olive oil
  • 3-4 pounds beef chuck roast, trimmed and cut into bite-sized chunks
  • 20 baby carrots, cut in half
  • 1 large onion, diced
  • 1 tsp. kosher salt
  • ¼ tsp. pepper
  • 3 tbsp. flour
  • 2½ cups full-bodied dry red wine
  • 2½ cups beef stock
  • 2 tbsp. tomato paste
  • 3 cloves garlic, smashed
  • 1 tsp. dried thyme
  • 2 crumbled bay leaves

For the glazed onions:

  • 8 oz. white pearl onions, peeled
  • 2 tbsp. butter
  • 1 tbsp. olive oil
  • ½ cup beef broth

For the sautéed mushrooms:

  •  1 lb. baby portabella mushrooms, trimmed and quartered
  • 4 tbsp. butter

 As far as your choice of wine is concerned, you have a lot of latitude. I chose a Merlot because I had just enough in a bottle I had opened the night before, but you’ll also get great results from a cabernet, zinfandel or practically any red Bordeaux.

And here we go. Start by preheating your oven to 325 degrees.

The first step, and an extremely important one, is to remove excess moisture from the beef, as this will prevent the desired browning during the initial cooking step. I do this by coating a large sheet pan with a couple layers of paper towels, spreading out the beef chunks in a single layer, then covering with another layer or two of towels. Let it sit for at least 10-15 minutes, and even help it along with a gentle pat or two.

When that is done, heat the olive oil in a large dutch oven over medium heat. Add the bacon pieces and cook until it is browned and the fat is rendered.  Remove the bacon to drain on a paper towel, leaving the fat in the pan.

Over medium-high heat, brown the beef in the bacon fat for a few minutes on one side. Resist the urge to turn the pieces, and work in batches to avoid overcrowding the pan, like so:

IMG_1040_edited

Allow the beef chunks to develop a rich brown sear on the bottom, then remove with a slotted spoon and set aside, repeating as needed until all of the beef has been seared on one side.  Trust me, this works.

IMG_1043_edited2

Next add the carrots and onions to cook in the remaining fat until they become tender and aromatic. Remove them to join the partially cooked beef (no worries, they’re all going back in together momentarily), and pour off the excess fat.

Return the beef, vegetables and bacon to the pan and season with the salt and pepper. Then sprinkle on the flour, stir through, and cook for about 5 minutes.  Add the wine, beef stock, tomato paste, garlic, and thyme, and bring the mixture up to a simmer.  And with that, it’s time to cover the pot, pop it in the oven, and let nature take its course as you sip some more of whatever wine you used for the recipe.  That reminds me of a joke I saw somewhere recently: “I like to cook with wine. Sometimes I even put it in the food.” Anyway, allow your dish to braise in the oven, covered, for about 3 hours.

As you’re nearing the end of the cook time for the main stew, you will want to start preparing the onions and mushrooms.

For the onions, heat the butter and oil in a skillet over medium heat, and cook the onions for about 10 minutes until brown on all sides. Add the beef broth, cover and cook gently for about 15-20 minutes until the onions develop a brown glaze.

For the mushrooms, heat the butter in a sauté pan over medium-high heat and cook the mushrooms for about 10 minutes, until they develop a deep, rich brown color.  When the cook time is finished on the stew, stir in the onions and mushrooms.

IMG_1048_edited2

And you’re done!  Adjust your seasoning with some salt and pepper, and serve it up by itself or over some cooked noodles, with a hunk of crusty French bread on the side. We were ooh-ing and aah-ing our way all the way through this dish, with big happy grins all around – definitely my best result yet for this dish.  Give it a try and let me know what you think.  Until next time: Eat well, my friends!

IMG_1051_edited2


Cuban Comfort Food (by any other name)

My first encounter with today’s dish was during a college tour trip to Manhattan.  We were visiting Columbia University with our son, who was then nearing graduation from high school.  When the time came to grab some lunch we popped into a Cuban joint across Broadway.  Sadly, in the intervening five years the place has closed, but it was there I sampled Ropa Vieja for the first time and was instantly hooked by this savory, bright-tasting meaty concoction.

IMG_0997_edited

Recently I made some Ropa Vieja for some friends whom we hadn’t seen in some time.  One of them was born and raised in Honduras, so when I introduced the dish by its Cuban name, she didn’t recognize it.  All that changed, however, the moment she took her first bite.  She instantly brightened up and said: “I know this dish. In Honduras we call it salpicón.  This is just like my dad made it.  This is comfort food for me.”  Needless to say I was deeply gratified at her enthusiastic response, despite the fact that I had cooked up this down-home Honduran fare entirely by accident.

Whatever you prefer to call it, here is what you will need for 6-8 servings:

  • 1 cup beef stock or low-sodium beef broth
  • 1 can (15 oz.) crushed tomatoes
  • 1 medium yellow onion, finely chopped
  • 1 red bell pepper, chopped
  • 1 green bell pepper, chopped
  • 1 jar (4 oz.) pimentos
  • 4 tbsp. tomato paste
  • 3 cloves minced garlic
  • 2 tsp. dried oregano
  • 2 tsp. ground cumin
  • 1 tbsp. sugar
  • 2 ½ to 3 lb. flank steak
  • ½ cup green olives, sliced
  • ½ cup chopped fresh cilantro
  • ¼ cup vinegar
  • Kosher salt and black pepper to taste
  • Fresh cilantro for garnish

You can do this dish either in a slow cooker or using a Dutch oven braise.  Either way, combine the stock or broth, tomatoes and paste, onion, garlic, peppers, pimentos, dried spices and sugar in your cooking vessel and mix well.  Season the flank steak well with salt, and cut it into pieces of about a half-pound each. Push the pieces down into the sauce until they are completely covered.  Cover and cook on low heat, about 8 hours for a slow cooker or 3-4 hours for a Dutch oven.

When the steak is quite tender, transfer it to your cutting board and shred it with a pair of ordinary forks, like so.

IMG_0993 (1)_edited

Return the shredded meat to the pot, along with the olives, cilantro and vinegar. Adjust your seasonings with salt and pepper, then cover to cook for another 30 minutes or so.

And with that, you’re ready to serve it up with a garnish of fresh cilantro.  Ropa Vieja is a great stand-alone dish, but also goes very well over a bed of rice.  We served ours with a side of my signature Cuban black beans, and there were big happy grins all around – even if we were actually eating Honduran food.  Until next time: Eat well, my friends!

IMG_0994_edited